Video Conferencing for Advanced Users
This guide is about 3CX’s advanced web conferencing features. For more information on creating a conference, please visit our video conferencing guide.
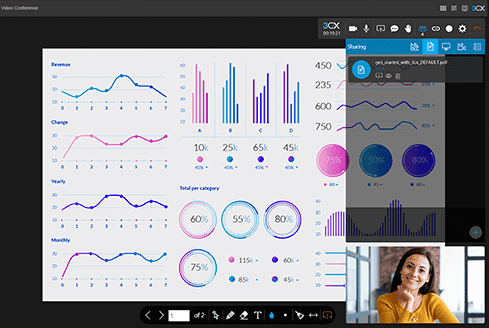
Managing a Video Conference
- “Turn Camera On/Off” – Toggle on/off to enable/disable camera.
- “Mute/Unmute Audio” – Toggle on/off to enable/disable microphone.
- “Present” – Access empty documents for whiteboard, chalk board, share PDF, share screen, camera sharing or start a poll.
- “Chat” – Open the chat window.
- “Raise your hand” – Select to indicate you would like to participate.
- “Participants” – View and manage meeting participants.
- “Add Participants” – Invite participants via email or WhatsApp or copy your meeting link.
- “Record” – Select the recording format preset and click “Start” to begin recording your video conference or remote control session. When the meeting ends, the organizer receives an e-mail with the download link to the recorded video.
- “Options” – Manage devices and meeting quality, and view statistics.
? Note: All shared PDF documents and recordings are kept on secure 3CX servers for up to seven (7) days after the meeting ends and then deleted.
Moderate and Control Users
An organizer can perform actions and provide additional rights to participants depending on their role, by clicking on a participant’s name and selecting:
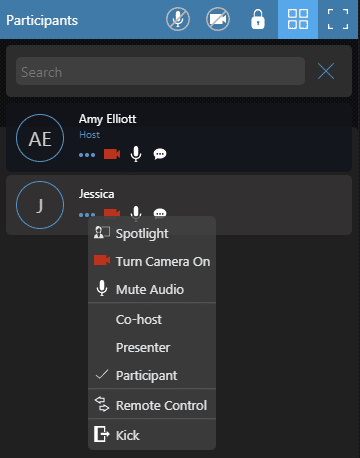
- “Spotlight” – Enlarges the participants window so that they can present or speak.
- “Turn Camera On” – Requests permission to enable the participant’s camera.
- “Mute Audio” – Enables and disables the participants microphone.
- “Co-host” – Has full control of the web meeting and can use all the available features, as well as use the Remote Control function, control cameras, microphone and chat access. Co-hosts can also accept, reject or kick a user out of a meeting.
- “Presenter” – Can share screen, reply to remote control requests, polling and share files and PDF documents.
- “Participant” – Can participate, reply to remote control requests and polls, chat and open shared files.
- “Remote Control” – An excellent way to provide exceptional customer service and solve problems quickly and efficiently.
- “Kick” – Immediately remove a user from a meeting. Kicked users can re-join a meeting, as “kicking” is not the same as banning a user.
? Note: The meeting creator’s role is denoted by the title of “Host” and cannot be moderated by other organizer(s).
Collaboration Tools
Whiteboard
Click the “Present” button and then “Whiteboard” and:
- Choose a blank or dotted document, or chalkboard template to use.
- Meeting participants can use the Whiteboard Toolbar’s tools on a shared whiteboard.
- To stop sharing the whiteboard press the “Stop Sharing” button.
Share PDF
Click the “Present” button and then “Share PDF” to upload and share PDFs from your “Repository” while in a meeting:
- The “Shared Documents” window opens to “Upload”, “Preview”, “Share” and delete PDF documents.
- All uploaded documents are saved automatically.
- Click the share
 button to share the document on all of the participants’ screens.
 - Using the Share PDF Toolbar at the bottom of the screen, participants can interact with the document using the Cursor, Pen, Eraser and Text tools as well as ask questions related to the specific document.

- To stop sharing the document, press the “Stop Sharing” button at the end of the toolbox.
Screen Sharing
Click on the “Present” button and select “Start Screen Sharing” to share your whole screen or a single window, browser tab or application. The option to “Share audio” is separate.
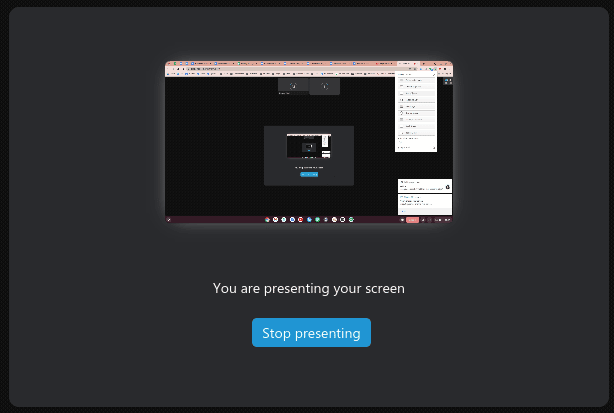
To stop screen sharing, click on the “Stop presenting” button on the sharing status message.
Shared Files
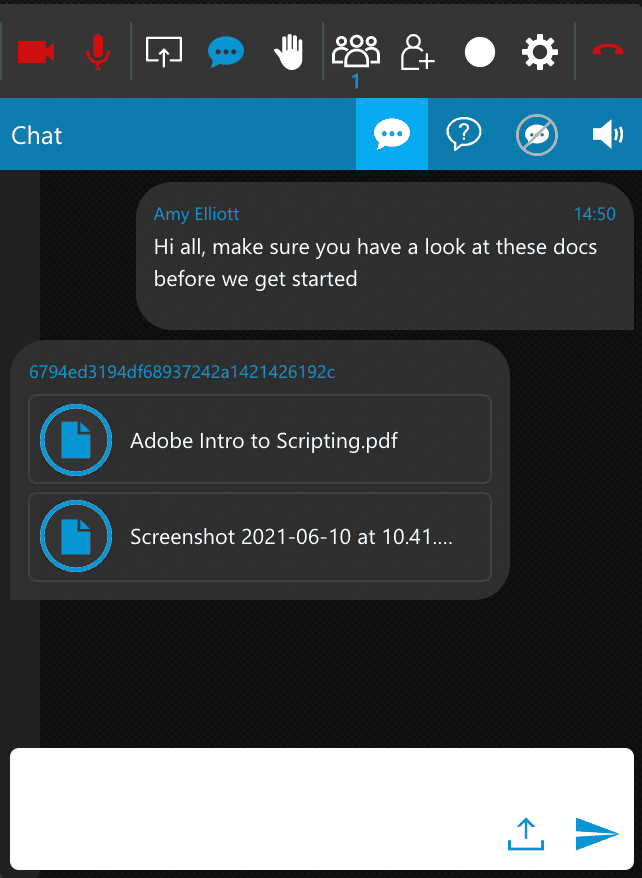
Use the “Meeting Chat” panel to share any file between meeting participants:
- Organizers and presenters can share files with size up to 64MB each, by:
- Drag-and-drop in the Chat panel.
- Clicking the “File upload” icon and selecting the file or files to share.
- All participants can click on shared files to open and save on their PCs.
- Shared files are marked with a blue icon for the sharing participant and with a white icon to other participants.
- Shared files are kept on secure 3CX servers for the duration of the meeting and then deleted.
Feedback
Create Polls
Organizers can actively engage with their audience and get their feedback by creating polls.
- Click on the “Present” button to bring up the Presentation options.
- Select “Start a new poll”
 . Here you can view previously created polls, share them, edit them and delete them.
 - Click the “plus” icon to create a new one.
- To create a new poll, add questions and respective answer choices for the participants and click on “Save” to store the new poll.
- To share a poll with users to vote on, click the “Share” button on the desired poll. The poll will be displayed for all participants to engage with.
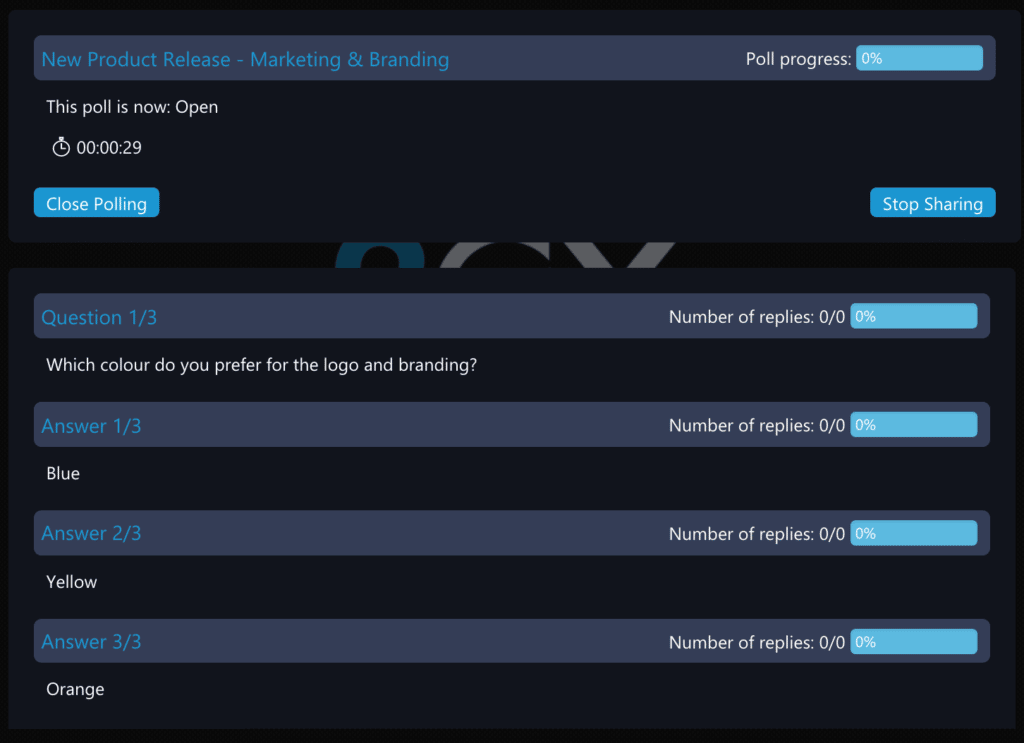
- Organizers can monitor an active poll, the percentage completed, its status (Open or Closed), the time elapsed and a real-time summary of the participants’ answers.
- Clicking on the “Close Polling” button completes the participant polling. Organizers can enable the “Share Results” option and then click on “Create Report”, to notify participants to download a PDF file with the poll results via the “Open Report” button.
- Organizers can click on the “Stop Sharing” button to remove the poll from the participants’ screens and resume the meeting.
Chat Q&A
In the Chat windows, you can create questions for and participate in a Q&A by clicking the “Q&A” ![]() button.
button.
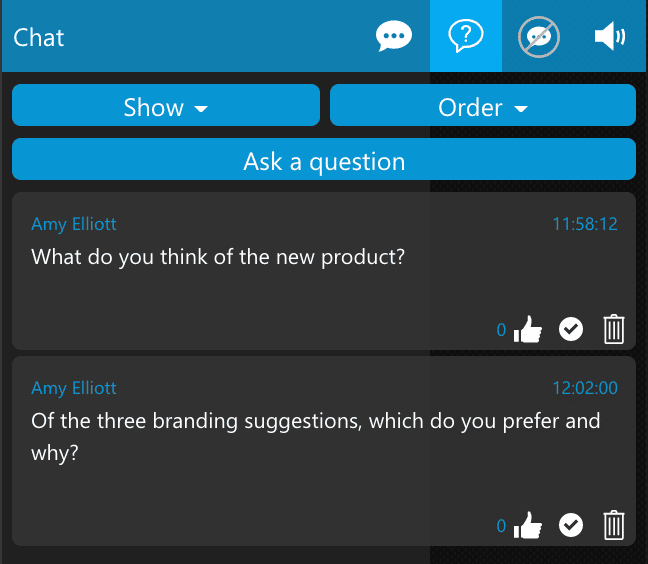
- You can view questions that you have “Answered”, are “Unanswered” or “All”.
- Sort questions by “Oldest”, “Newest” and “Popular”.
- You can easily add your own questions by clicking the “Ask a Question” button.
Remote Control Windows PCs
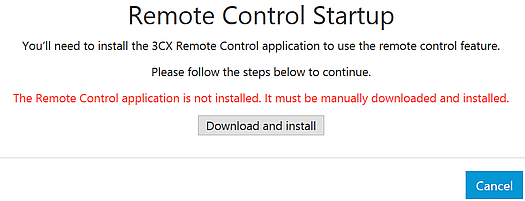
This feature requires the “3CX Remote Control Client” for Windows 8.1+ x64 to be installed on a PC to be remotely controlled. If the Remote Control Client is not installed, you will be prompted to download and install it.
To initiate a WebMeeting remote control session:
- Any meeting organizer can click on a participant’s name in the “Participants” panel and select “Remote Control”.
- The participant on the other end can:
- Click “Yes” on the “Allow Remote Control” on-screen prompt to accept the remote control request.
- Then click on “Open 3CXWMRemoteControl” to authorize the Remote Control Client to open the associated link.
- If the participant has multiple screens, the organizer needs to select the one to remotely control.
- The organizer can click on the blue “Remote Control” icon to open the remote session dialog and optionally select another screen to control or end the remote session.
? Note: To use a shared bidirectional text clipboard during the remote control session, the “3CX Remote Control Client” needs to be installed on both the organizer’s and participant’s PCs.
Meeting Rooms
3CX supports these virtual meeting rooms, as set by your system administrator:
- Private – For one-on-one meetings, ideal for support and customer service queues. Your personal extension’s or assigned queues’ Click to Meet URL can be used as a virtual Private room, enabling anyone to join from their browser as a participant via a:
- Personal WebMeeting link – the system sends a notification e-mail or chat to the assigned extension.
- Queue WebMeeting link – all member agents assigned to the queue receive a notification email or chat. Once a member agent clicks on the link and joins the WebMeeting, other members cannot join.
- Shared – Organize group meetings, if the option “Requires you to connect to meeting first” is enabled by your PBX Administrator. Participants can join the meeting via the WebMeeting link:
- Directly if the organizer has already joined.
- After the organizer’s approval if the “Approve Participants” option is set by the PBX administrator for your extension to moderate participants.
? Notes:
- If the “Approve Participants” option is set, kicking a participant out of a WebMeeting enables the organizer to keep them from rejoining.
Retrieve your Personalized Click2Meet URL
Your Click2Meet URL is set by the 3CX administrator and sent to you in your Welcome Email. It can be personalized to share via your email signature or on your website.
Important: We recommend using your personalized Click2Meet URL in “Private Rooms”.
Joining via a Click2Meet URL
To use Click2Meet, your administrator must set the “Requires you to connect to meeting first” option for your extension or queue for Click2Meet meeting requests to be delivered.
- A third party clicks on the Click2Meet URL and 3CX WebMeeting opens in their browser.
- An email and a chat message is sent to you, as a request by the participant to have an online meeting.
- Click on the link provided in the message to join the meeting or ignore.
? Note: For queues, once an agent joins the web meeting no other party can join, unless they are invited from within the meeting. When the meeting ends, agents receive a report via email.
Settings
To change the WebMeeting settings, click on the “Settings” icon on the right sidebar to control:
- Device options including:
- Video input source – Select Webcam to use
- Audio input source – Select Microphone to use
- Audio output device – Select Speaker to use
- Device test – click on the “Test” button to test your device
- Meeting Quality – choose between “Stability”, “Balanced” and “Quality” profiles to automatically adjust the video quality, for a more stable meeting experience.
- Advanced Settings:
- Full HD resolution in Quality Mode (High CPU usage)
- Auto Gain Control – increases or decreases your mic’s input and output
- Echo cancellation – removes echo caused by the mic picking up the speakers output
- Noise suppression – filters out very specific noises like keyboard typing
- “Statistics” – Technical info, advanced statistics and graphs for troubleshooting connectivity issues